DESIGN QUALIFICATION OF INSPECTION CONVEYOR 3.1/2” X 5 FT
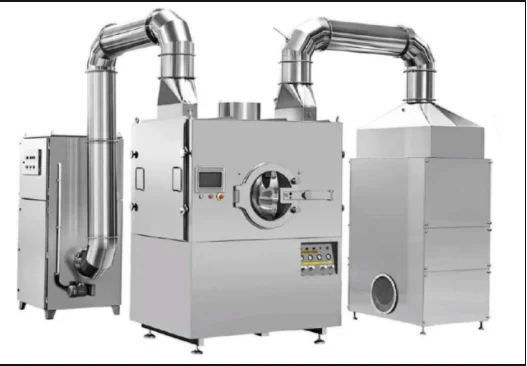
Inspection table is equipment consisting of a three-track conveyor with a hood with lighting arrangement and visual inspection background of alternate black & white color. Inspection table have stainless steel structure with moving SS slat chain. Structure made out of SS square pipe & supported on adjustable bolts.
Contents
- Objective
- Scope
- Responsibilities
- Machine Description
- Technical Specification
- Consumption (Utilities & Power)
- Material of Construction
- MOC Certificate
- Fat Procedure
- Change Control Procedure
- Reference Documents
- Abbreviation
- Approval Sheet
- Customer Approval Sheet
OBJECTIVE:
- To design, engineer, and supply the Inspection Conveyor.
- To prove that each operation proceeds as per the design specification and the tolerances prescribed there in the document is the same at utmost transparency.
SCOPE:
- The scope of this qualification document is limited to the Design Qualification of Inspection conveyor belt suitable for inspection of filled & sealed bottle. This qualification document is part of a validation activity for the Inspection conveyor belt.
- Qualification of support utilities is not within the scope of this qualification documents.
- The equipment shall be used for Inspection of filed & sealed bottle shall operate under dust free environment & conditions as per the GMP requirement Equipment.
RESPONSIBILITIES:
Client:
- To provide the URS for the equipment.
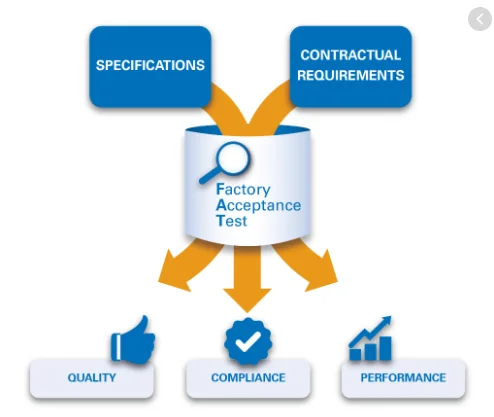
- To perform the Factory Acceptance Test (FAT).
Manufacturer:
- To provide the complete technical details of the equipment pertaining to its design, comprising of the following:
- Machine Description
- Technical Specifications for bought-out items
- Product Contact Parts
- Brief Process Description
- To facilitate the client for the Factory acceptance test of the machine at their works/ site.
- If at any point in time, any change is desired in the mutually agreed design, Change control procedure shall be followed and documented.
MACHINE DESCRIPTION:
Inspection table is equipment consisting of a three-track conveyor with a hood with lighting arrangement and visual inspection background of alternate black & white color. Inspection table have stainless steel structure with moving SS slat chain. Structure made out of SS square pipe & supported on adjustable bolts.
Process:
The central conveyor belt brings the bottle from the capping machine conveyor. These bottles are automatically separated on the two adjoining conveyor belts & further on the side tables for operators sitting on either side of the table. The operators in turn pick up the bottles & visually inspect the bottles in the alternate white & black background to check for any partials in the liquid filled, sealed & breakage of bottle. After inspection the bottles are placed in the central track, which is transfer for labeling or any other operation.
TECHNICAL SPECIFICATION:
| Sr. No. | Description | Specifications |
| 1. | MODEL | PVBI-120 |
| 2. | MAIN MOTOR | MAKE : BONFIGLIOLI 0.25HP/0.18KW/1.01A/230V/1360RPM/3PHASE |
| 3. | MAIN GEAR BOX | MAKE : BONFIGLIOLI MODEL : VF44 F120 P63 B5B3 |
| 4. | MAIN A.C DRIVE | MAKE : ALLEN BRADLEY MODEL : 22F-A2P5N103 |
| 5. | MAIN SWITCH | MAKE : SCHNEIDER |
| 6. | MACHINE DIMENSION | 1520mm L x 850mm W x 1550mm H |
CONSUMPTION (UTILITIES & POWER):
| Main Motor | Specification |
| Voltage Hp Kw Hz Phase | 230 0.25 0.18 50 3 Phase |
MATERIAL OF CONSTRUCTION:
| Sr. No | Component | MOC |
| Machine frame structure | SS Square Pipe frame | |
| External cladding | SS 304 | |
| Conveyor Belt | SS 304 | |
| Conveyor Driving Chain Wheel | Nylon |
MOC CERTIFICATE:
| Sr. No | Component |
| SS 304 |
AT PROCEDURE:
Factory Acceptance Test Procedure shall be as follows:
- After the completion of erection work of the machine, client or authorized representative, on behalf of the client shall be informed to perform the factory acceptance test (FAT)
- Client or authorized representative, on behalf of the client, shall perform the FAT at the manufacturer site and record all the data in the prescribed FAT document as per the details given below:
- Test Criteria
- Design verification check list
- Deficiency and corrective action report
- Pre – installation requirements
- Final reports.
CHANGE CONTROL PROCEDURE:
Any modification arising in the design at a later stage, shall be incorporated only after due authentication of change control procedure. The client and the manufacturer should authenticate the change control procedure.
REFERENCE DOCUMENTS – ANNEXURE:
| Sr. No. | Documents |
| 1. | Equipment Brochure |
| 2. | Operational and Instructional Manual |
| 3. | General Arrangement Drawing |
| 4. | Electrical Circuit Diagram |
ABBREVIATIONS:
| Abbreviated Form | Expanded Form |
| NA | Not Applicable |
| DQ | Design Qualification |
| GMP | Good Manufacturing Practice |
| URS | User Requirement Specification |
| HP | Horse Power |
| RPM | Revolution Per Minute |
| Hz | Hertz |
| MOC | Material Of Construction |
| SS | Stainless Steel |
| MS | Mild Steel |
APPROVAL SHEET:
Prepared by:
The signature below claims to have compiled the protocol with respect to the User Requirement Specification
Reviewed by:
The below signatory claims to have verified the specifications as laid in the defined qualification protocol.
Approved by:
The below signatory authenticates the protocol to have met with the specifications and that the machine is as per the defined protocol.
CUSTOMERS APPROVAL
Reviewed by:
The Reviewer’s signature claims to have verified the specifications as laid in the defined qualification protocol.
Approved by:
The Approver authenticates the protocol to have met with the specifications as laid in the User Requirement Specification and that the machine is as per the defined protocol.


